
Hello Readers! In this blog, I’m going to talk about how you can quickly share your files between devices which are connected to the same local network. Also, we will see how we can share files remotely via Internet from your local server to anyone.
Concept Discussion :
Lets now discuss about what we are going to do technically. Suppose, I’m having some files in my laptop in a folder called “My Files”. Now I need to copy these files to my mobile phone. How can I achieve this?
You might be thinking, just connect your phone with your laptop using a data cable, copy those files and get the job done, man! Ofcourse! You are right. We can do so. But what if I tell you there is a better way!
So, the simple concept is, we are going to create a python HTTP server, and serve those files from our laptop. Now, anyone who is connected with your router can directly hit the IP of your laptop from their browser and volla! They can now totally access those files. Ofcourse, they can only download them but that is what we need right? We are sharing those files from our laptop.
Required Tools :
The tools that we need to do this, are :
- Python (Just Basic Python, no dependencies!) Download : https://www.python.org/downloads/
- ngrok (A tunnel tool for later part) Download : https://ngrok.com/download
- A Laptop & A mobile phone! 😛
Main Content :
I am not mentioning the installation steps of Python & ngrok here, because that will make the blog so much longer. Just go to their respective websites and follow the instructions to install them step by step. They have detailed instruction available for setup.
Step – 1 :
Now open the folder in explorer (finder in mac / respective file manager in linux) which you want to share to your other devices. In my case, it is “My Files”.
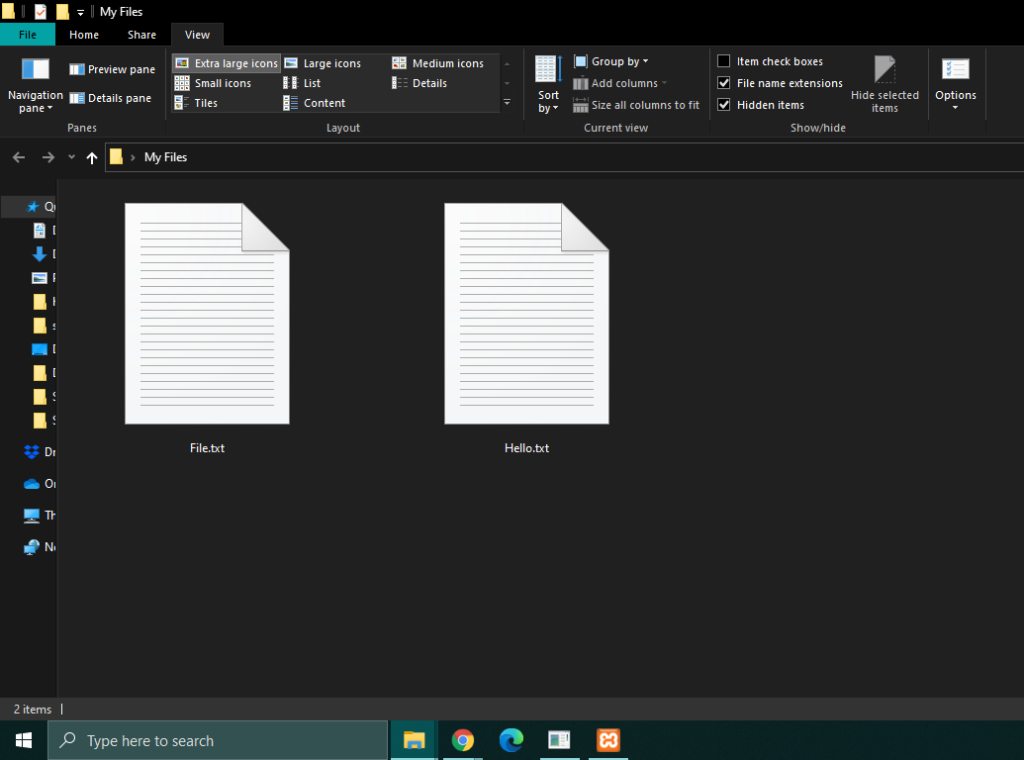
As you can see, I am having two text files inside my “My Files” folder which are “Hello.txt” & “File.txt”.
Step – 2 :
Now we have to open a cmd/terminal window on this folder. There are a lot of ways to do so. I’m mentioning one here.
Just click on the Location Bar of the explorer in the current folder(“My File” in my case).
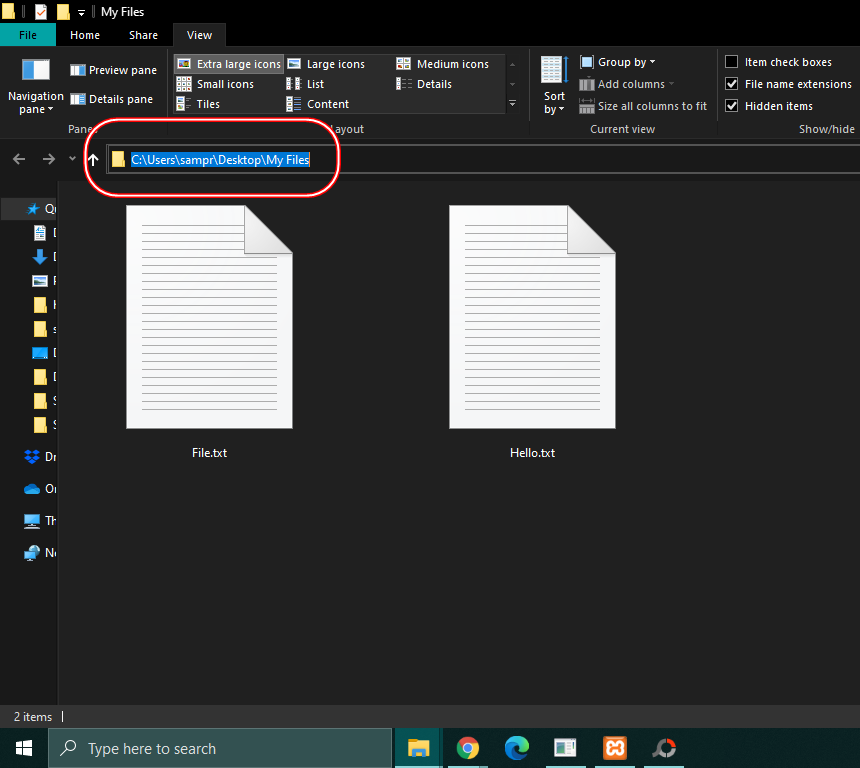
As you can see from the screenshot, the path is selected.
Step – 3 :
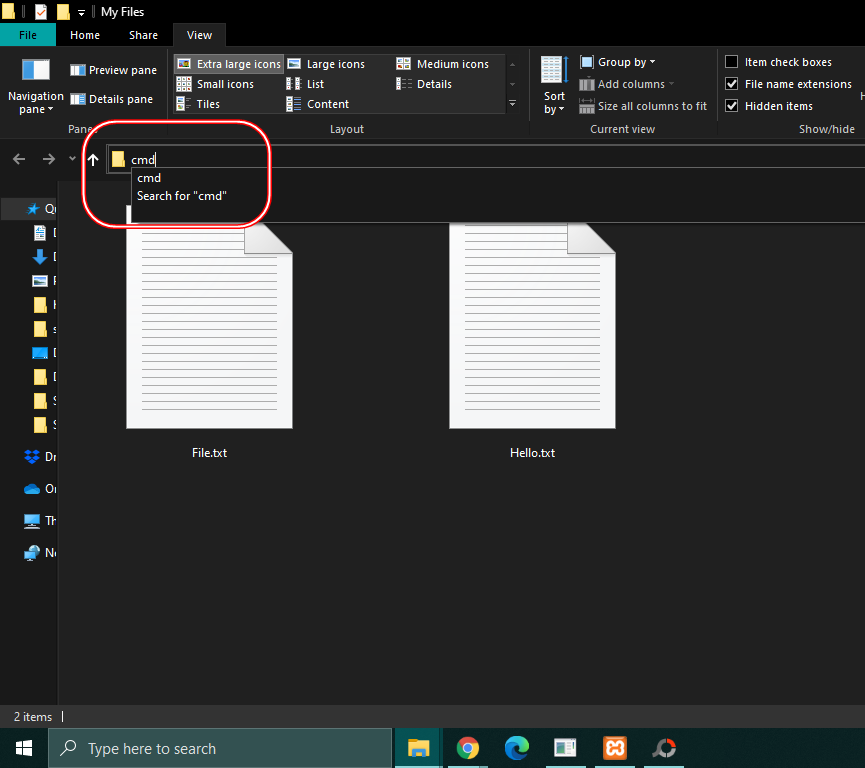
Now type “cmd” in there & hit ENTER. Command Prompt window will be opened infront of you.
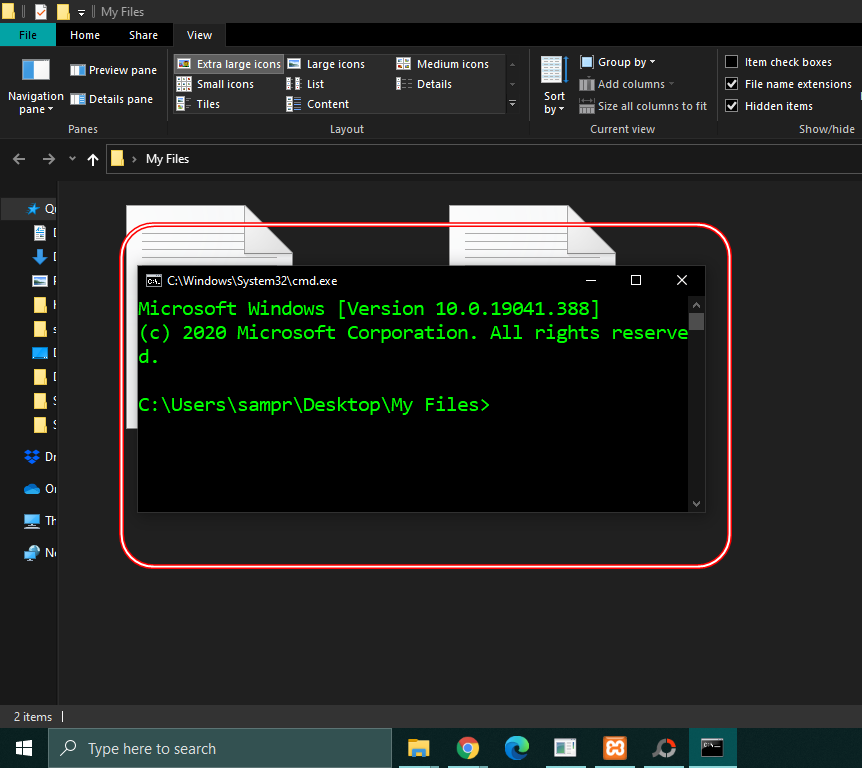
Now the CMD window or command prompt looks something like this :
For linux or mac guys, open terminal in this path. I’m not focusing on the linux/mac instructions directly, but steps are similar.
Step – 4 :
Now in the cmd window, type :
python -m http.server 80
and hit Enter!
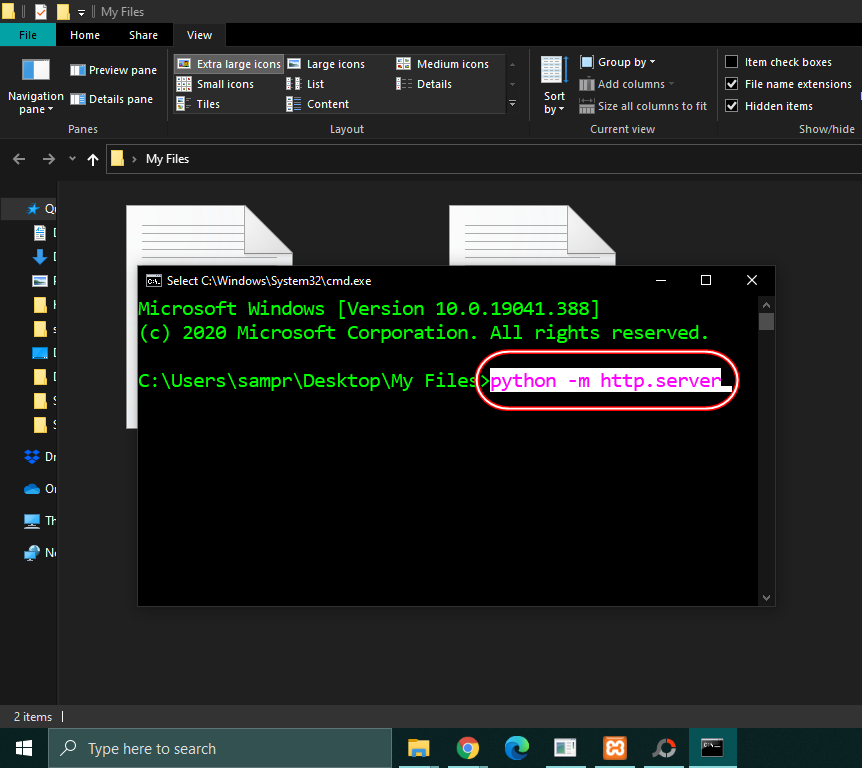
Note : Make sure you have downloaded python and configured it successfully. If python is not in your environment variable, you will face error. Follow the installation steps of python carefully!
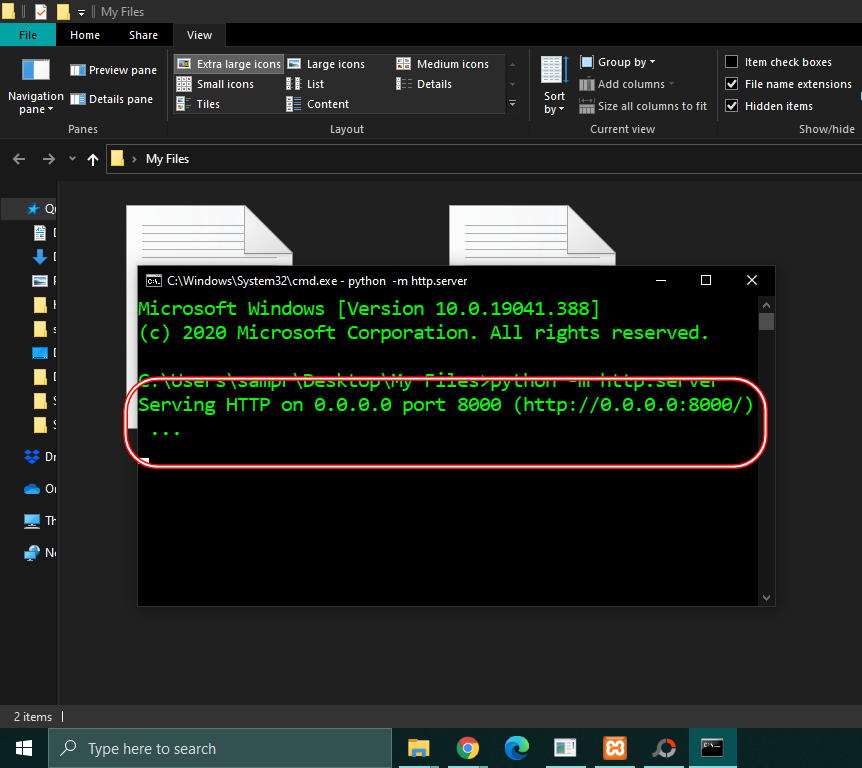
After this, you will see that python HTTP server is running.
Step – 5 :
Now we need to find the IP of this laptop.
Open another window of cmd/terminal just like before and type :
ipconfig
For Windows. For Linux/Mac, type:
ifconfig
and hit Enter!
You will see a lot of information will be printed along with the IP address. IP address will be in the bottom with the key “IPv4 Address”.

Step – 6 :
After getting the IP address, just open your smartphone which is connected to your same router and type the IP address of your computer in browser.
Volla! All the files are here & you can download them all!

Step – 7 :
Now upto this, everything is okay. We now can share the files inside my local network only. But what if I need to share the files remotely ? For example, I need to share those files to someone who is not connected with my router. Ofcourse, there are a lot of online ways available (like GDrive, One Drive, Mail etc) but in those ways, you have to upload the files to their respective servers and then you can share the link. But what if you’re not willing to upload your files to somewhere else ?
That’s where ngrok comes into play! ngrok securely creates a tunnel between your local server to the internet. So that everybody can access your local server from the internet.
I’m skipping the installation and setup of ngrok here. Just follow the official website for that.
Now open a cmd window where your “ngrok.exe” file is. For linux/mac, it will be a simple executable named “ngrok”.
Step – 8 :
Now type in the cmd window :
ngrok http 80
For Windows, and for mac/linux, type :
./ngrok http 80
in the terminal and hit Enter!

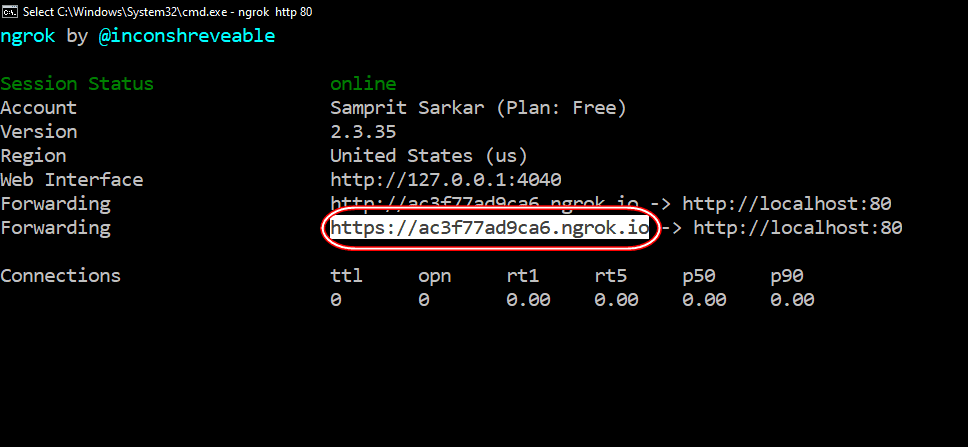
Step – 9 :
Now ngrok will be connected and it will generate a random URL for your local server with the key “Forwarding”. It will look something like this :
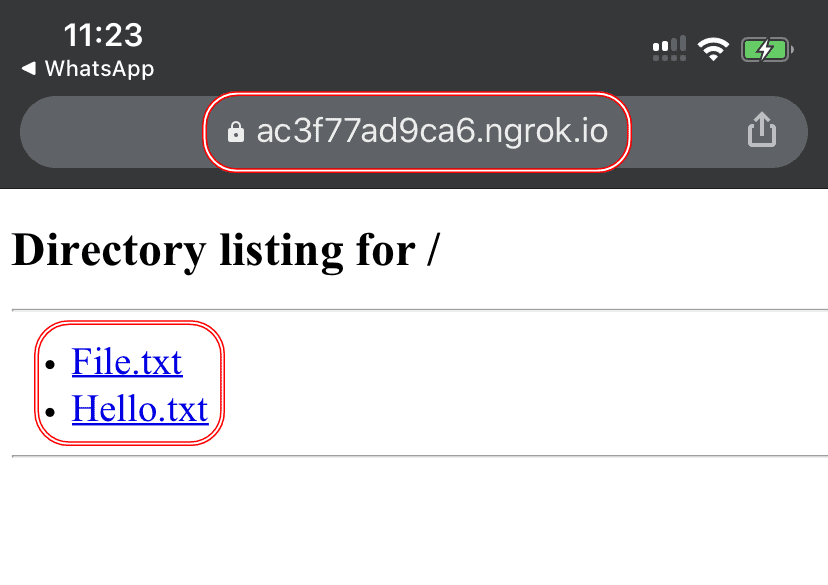
Step – 10 :
Now open this URL again from anywhere from your browser and Volla! All the files are here!
That is how you can create a local HTTP server in python and connect it with the Internet using ngrok, and share files!
I hope “You” (who is reading this) learned something today. Thanks for reading till the end. Please leave your valuable feedback in the comments. A lot more content like this is coming up. If you feel like sharing it, then please do share the article. It means a lot!

Hi, This is Samprit. I am a programmer by profession and passion. Currently, I’m working as a Senior Python Developer in a Tech Company in India. I love to write codes and share about it. Follow me for great tech articles and tutorials. For any kind of queries, drop a message in the contact section of the website.